Spring IOC with XML Configuration - Maven Project
I consider you are aware about maven if not please refer my video or tutorial related to maven from my website.
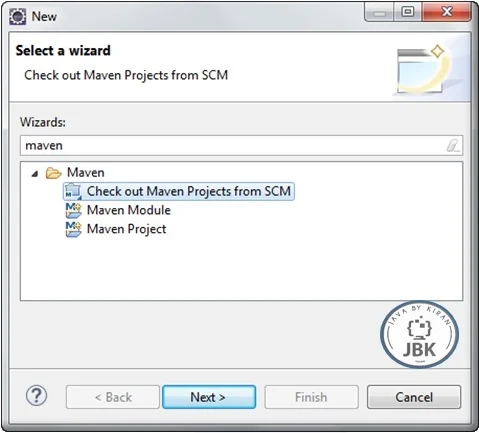
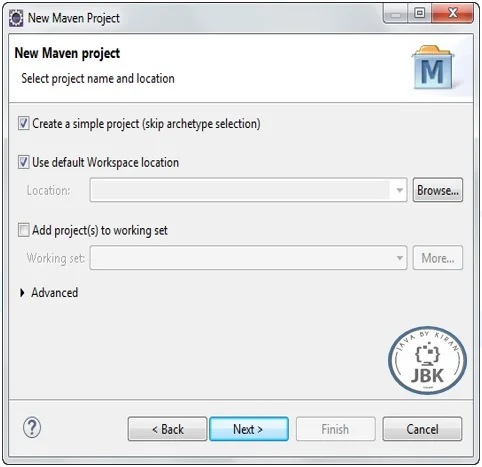
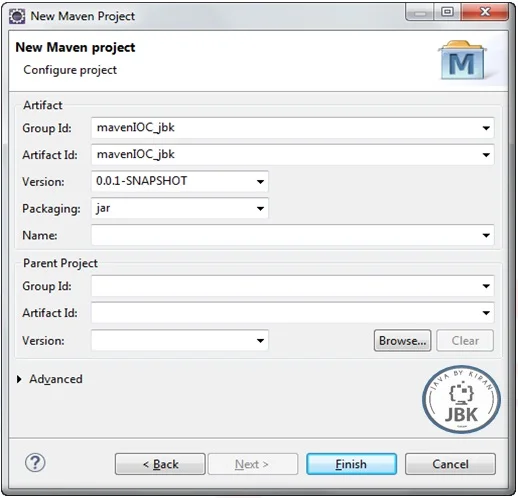
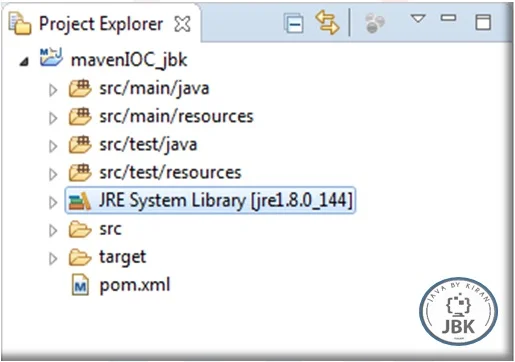
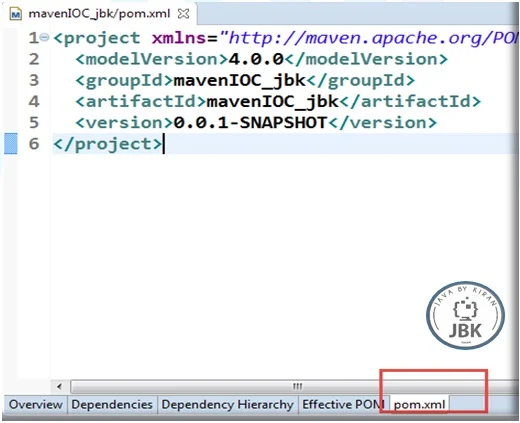
Below are steps.
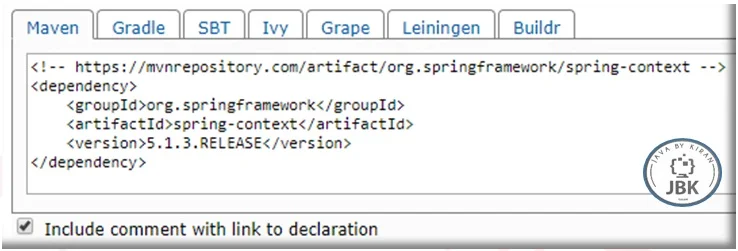
See below of this on same webpage, you will see Compile dependencies section

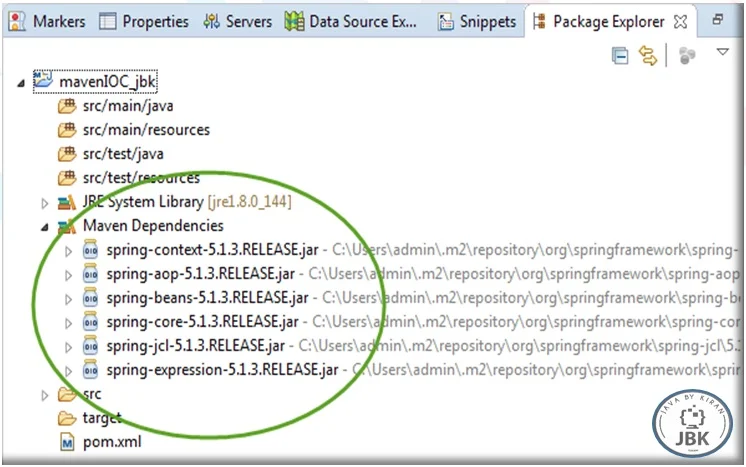
After saving pom.xml you will see dependencies are downloading from maven remote repository. To see what has downloaded go to package explorer. Open Maven Dependencies.
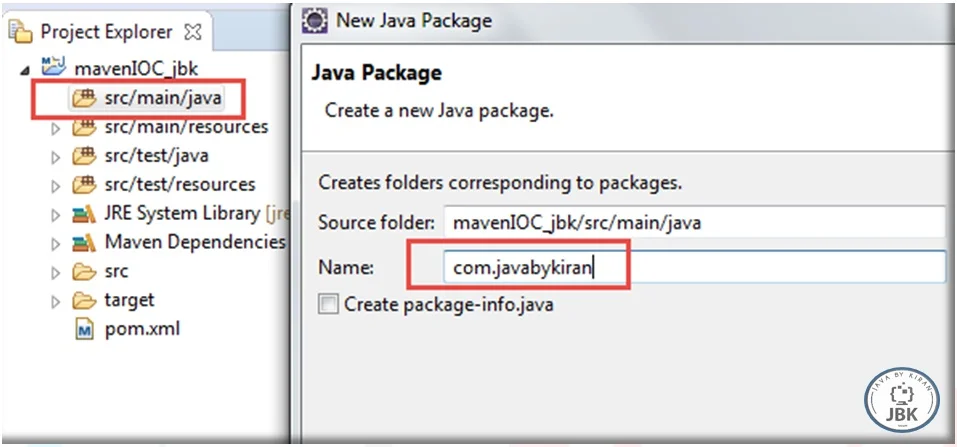
We will use src /main/java/ any package folder and resources folder for configurations. If any folder is not there create as new folder. You may not see resources folder in your project so create it. Below image shows how to create a package.
src/main/java/<com/javabykiran> / <your java files goes here>src/main/resources/ <your configuration/properties files goes here>
Now setup is complete and we are ready to code in eclipse IDE.
Let’s understand a concept:
We have class Student with address, age, and list of mobile nos.
     package com.javabykiran;
import java.util.ArrayList;
public class Student {
    Address address;
    int age;
    ArrayList<String> mobileNos;
}

package com.javabykiran;
public class Address {
    String landmark;
}
Create getter and setters for all of the above. This we need to do as dependencies are injected through setter methods of every individual variable.
Above classes will look like below:package com.javabykiran; import java.util.ArrayList; public class Student { Address address; int age; ArrayList<String> mobileNos; public Address getAddress() { return address; } public void setAddress(Address address) { this.address = address; } public int getAge() { return age; } public void setAge(int age) { this.age = age; } public ArrayList<String> getMobileNos() { return mobileNos; } public void setMobileNos(ArrayList<String> mobileNos) { this.mobileNos = mobileNos; } }
     package com.javabykiran;
public class Address {
    String landmark;
    public String getLandmark() {
        return landmark;
    }
    public void setLandmark(String landmark) {
	this.landmark = landmark;
    }
}
Reason for setters is:
We need to initialize all above global variables with IOC by using dependency injection concept. Not directly as we do in traditional programming.
To do this we will need configuration file as well. So create this file in resources folder name can be anything. I made it as a spconfig.xml
Code will look like below.
     <?xml version="1.0" encoding="UTF-8"?>
<beans xmlns="http://www.springframework.org/schema/beans"
xmlns:xsi="http://www.w3.org/2001/XMLSchema-instance"
xmlns:context="http://www.springframework.org/schema/context"
xmlns:aop="http://www.springframework.org/schema/aop"
xsi:schemaLocation="http://www.springframework.org/schema/beans
http://www.springframework.org/schema/beans/spring-beans.xsd
http://www.springframework.org/schema/context
http://www.springframework.org/schema/context/spring-context.xsd
http://www.springframework.org/schema/aop
http://www.springframework.org/schema/aop/spring-aop.xsd">
    <bean id="address" class="com.javabykiran.Address">
        <property name="landmark" value="park plaza"></property>
    </bean>
    <bean id="stu" class="com.javabykiran.Student" scope="singleton">
        <property name="age" value="30"></property>
        <property name="address">
            <ref bean="address"/>
        </property>
        <property name="mobileNos">
            <list>
                <value>8888809416</value>
                <value>9552343698</value>
            </list>
        </property>
    </bean>
</beans>
Every tag of this file we will understand in detail.
bean: we need to define every class here. Internally spring creates object of this class. Below are important attributes
After instantiating bean whatever we want to do as a dependency injection we can specify in property tag. In our example we want to initialize 3 variables age, address, and mobile nos. see below explanation.
property: specify setter names here and initialize them as per there type. Every type has different concept of implementation. In our case we will see primitives, class type and collection type.
After this we will create client from which we will be invoking class of student to create object and to inject values as specified in xml.
     package com.javabykiran;
import org.springframework.context.ApplicationContext;
import org.springframework.context.support.ClassPathXmlApplicationContext;
public class Client {
    public static void main(String[] args) {
	1) ApplicationContext ctx = new ClassPathXmlApplicationContext("classpath:spconfig.xml");
	2) Student student = (Student) ctx.getBean("stu");
	3) System.out.println(student);
	4) System.out.println(student.getAddress());
        5) System.out.println(student.getAddress().getLandmark());
    }
}
In above code,
Line no 1) create a context and parse complete xml file from top to bottom. All objects will be created and if any errors those will be notified in console. Injections will also applied while reading xml file. First constructors will be called for beans. Then setters will be called which are mentioned in property tag. Application Context is container which holds all objects. Here we have used ClassPathXmlApplicationContext which is an implementation of ApplicationContext interface in spring.
This line can be replaced with many other ways like BeanFactory etc. in details it will be explained later in this chapter.
Line no 2) we are getting one of bean from context. This depends on scope whether to create new object again and again or just once. In our case it is singleton. Try making scope as a prototype and write getBean method multiple times you will see every time it will return new address.
Line no 3) returns address of student class
Line no 4) address objects as we injected from xml.
Line no 5) landmark injected in address and address object in student so we are retrieving child object from parent object.
Output should be as below :
     com.javabykiran.Student@2038ae61
     com.javabykiran.Address@3c0f93f1
     park plaza
Till now we have seen basic fundamentals which are very important to understand advance concepts of spring. Without understanding this concept we may not able to understand even other modules of spring.
In spring later introduced a concept called as auto wiring which detects automatically which beans to inject in which bean.in our case address in student. We will see in the next chapter about Auto Wiring
