Eclipse Configuration
Eclipse Installation
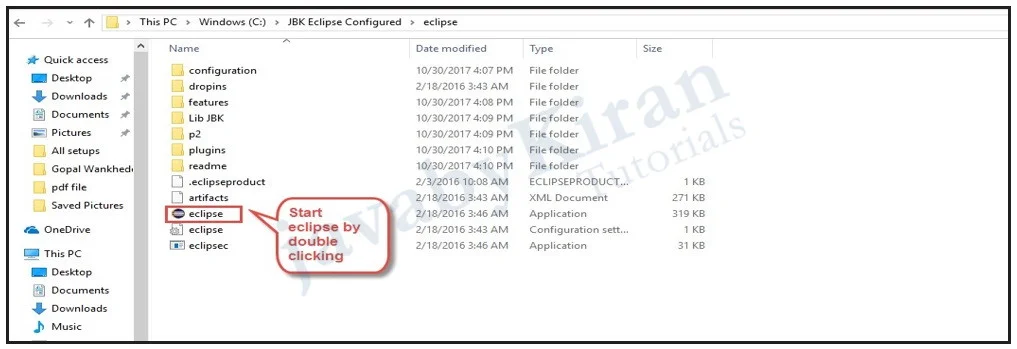
You can start eclipse by double clicking on the “eclipse.exe” (which will be present in the folder you saved the .exe file in).
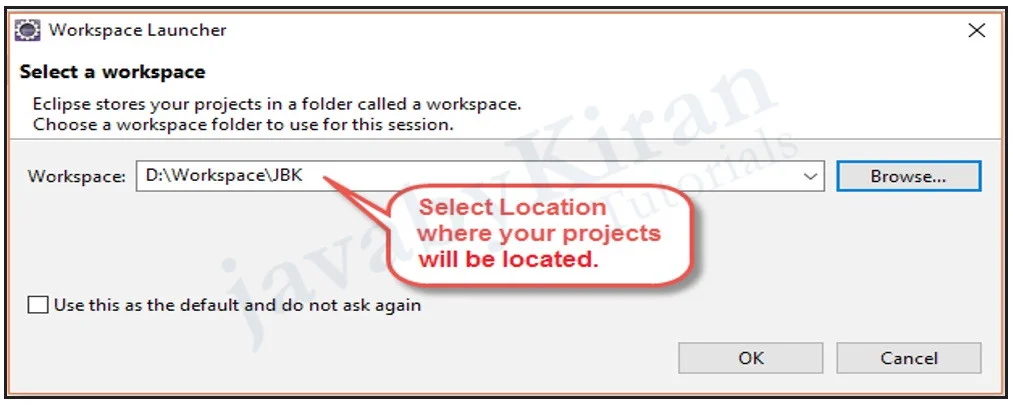
When you start the eclipse for the first time, it will open Workspace Launcher as the startup window which shows the location of the workspace folder. All your data will be stored in this workspace folder. You can either keep the default location or save it in the new location as per your choice.
If you select “Use this as the default and do not ask again” option as shown below, the dialog box will not show up every time you save your data/work.
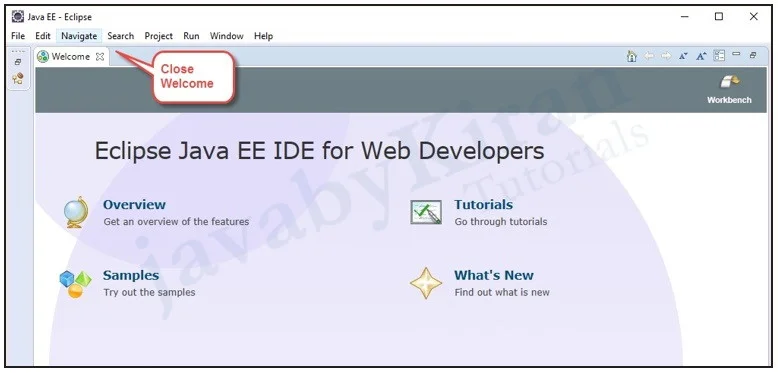
After closing the above tab, welcome tab will be displayed as shown below.
The below figure shows the various tabs in the eclipse, labelled with their names:
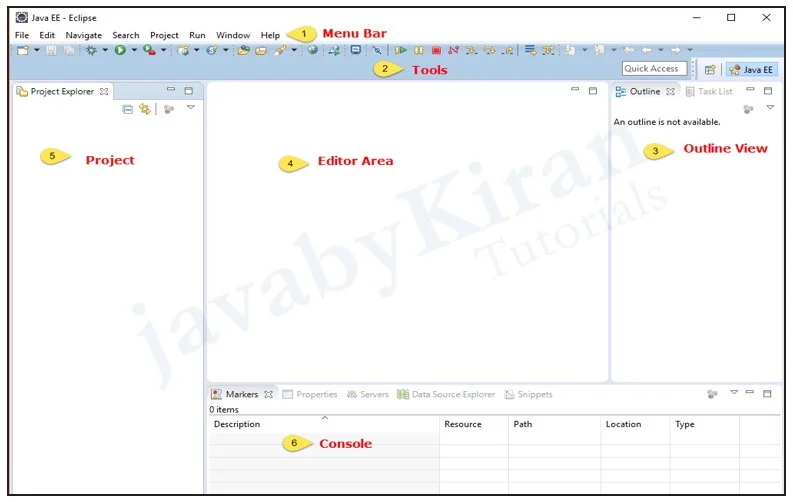
Steps to create New Project in Eclipse
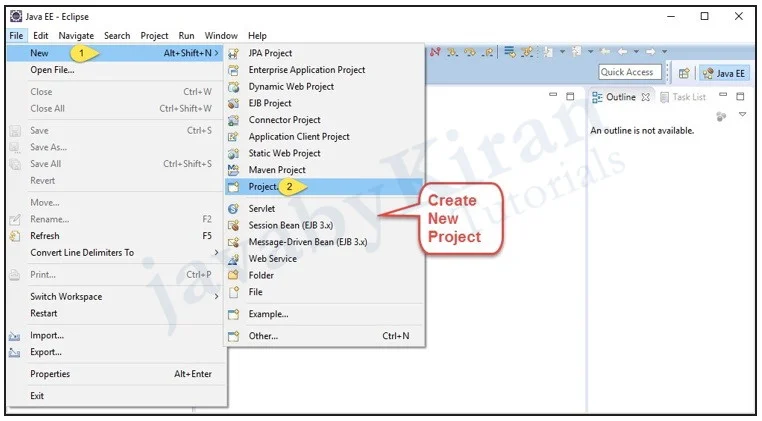
Click on the “File” in the “Menu Bar” and go to New > Java Project.
If “Java Project” option is not available then go to Other > Java Project.
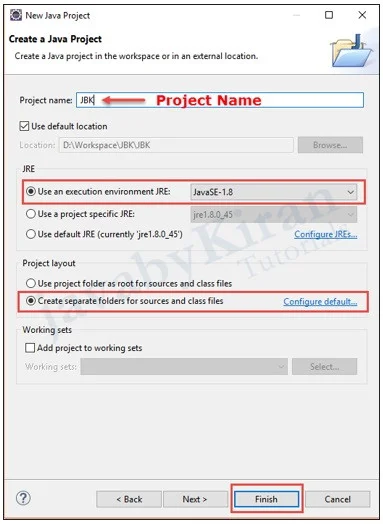
Then enter the “Project Name”.
Select the Java Runtime Environment (JRE) as per your requirement/choice or leave it as “default”.
Select the “Project Layout” as per the requirement whether you need a separate folder for the “sources code “and “class files” or a “root folder” combined for both.
It is recommended to create separate folders for “source code” and “class files”.
Then click on the “Finish”.
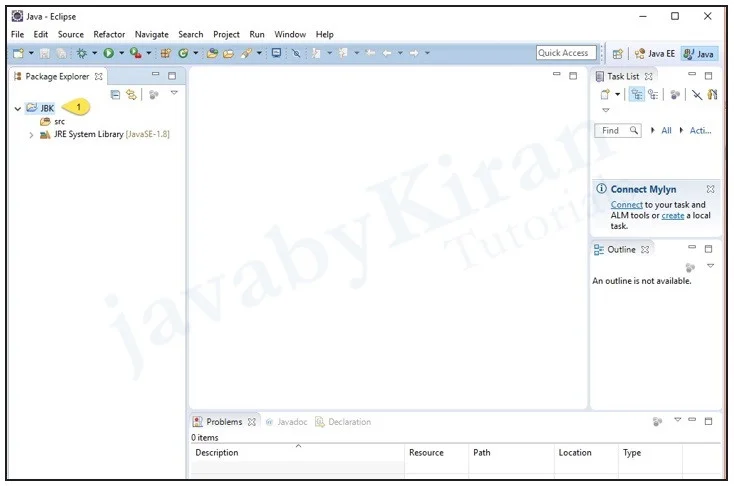
The “package explorer” shows the newly created Java project.
Now right click on the “src” folder in “package explorer” and then go to New > Package.
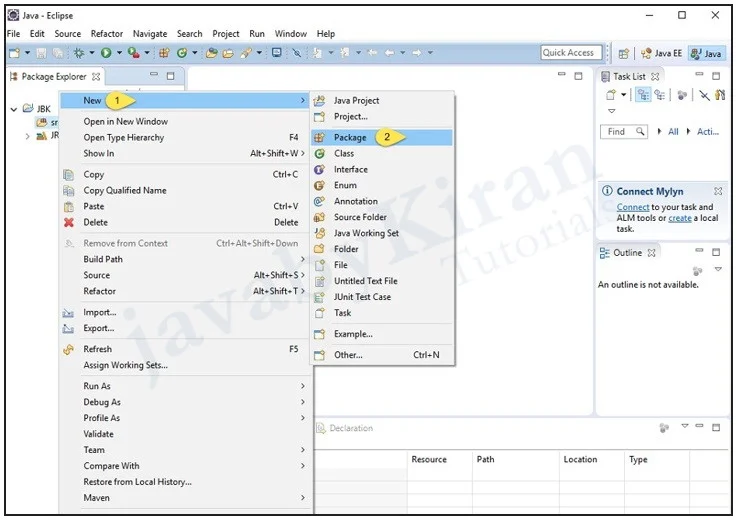
This will open “New Java Package” wizard where we will create a “Java package”.
When you are creating a sub package, first open the “Java Package” wizard and then select the parent package so that “name” field can have a default value in it.
Once the Java Package wizard opens perform the following steps:
Enter/confirm the “source folder” name.
Enter the “package name”.
Click on the “Finish” button.
The “package explorer” will now show the newly created package under the source folder.
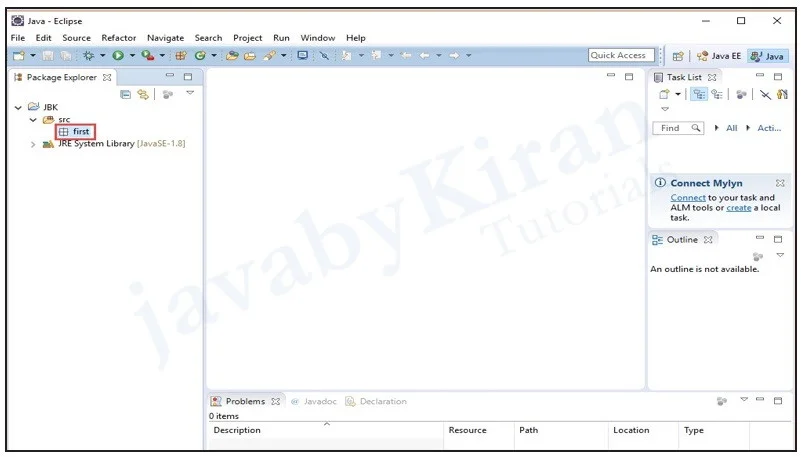
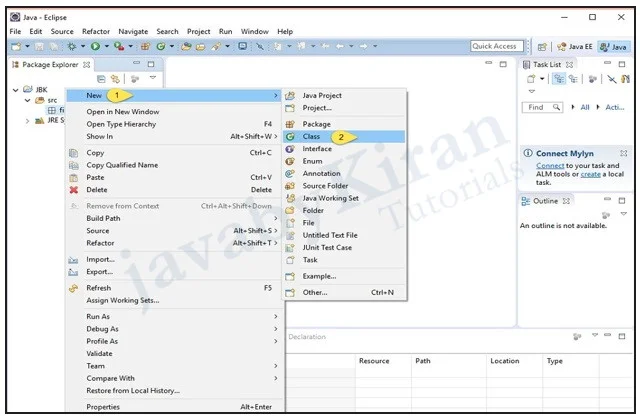
After creating package e.g first, right click on that package and then Select > New > Class as shown in the below figure.
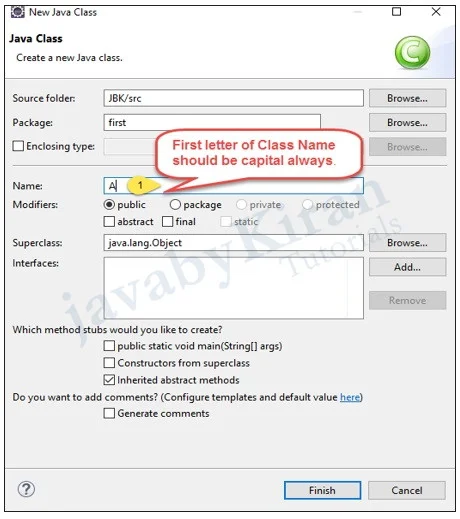
After that click on the “Finish” button on entering the value in “Name” field which will create “Name.java” file as shown in the above figure (here A.java file is created):
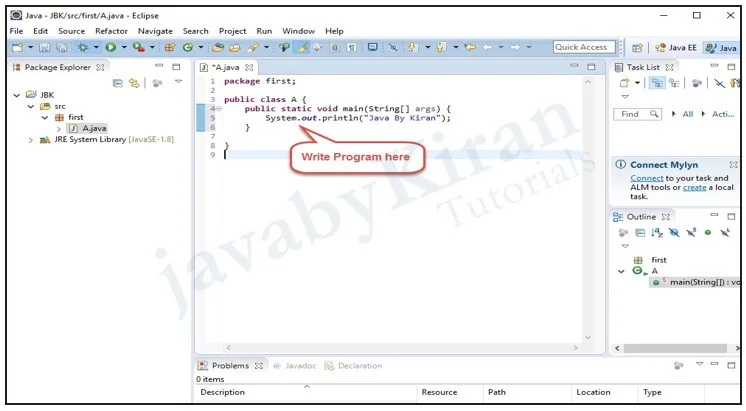
Write the below program in “A.java” file window as shown in the figure.
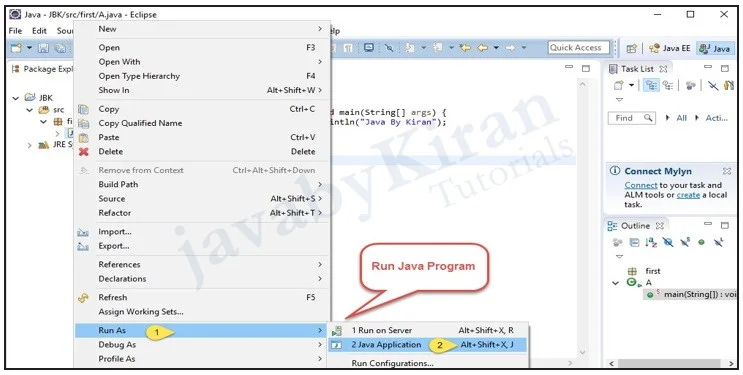
The quickest way to run a Java program is by using the “Package Explorer” view.
In the Package Explorer view:
Right-click on the java class that contains the main method.
Then select Run As > Java Application
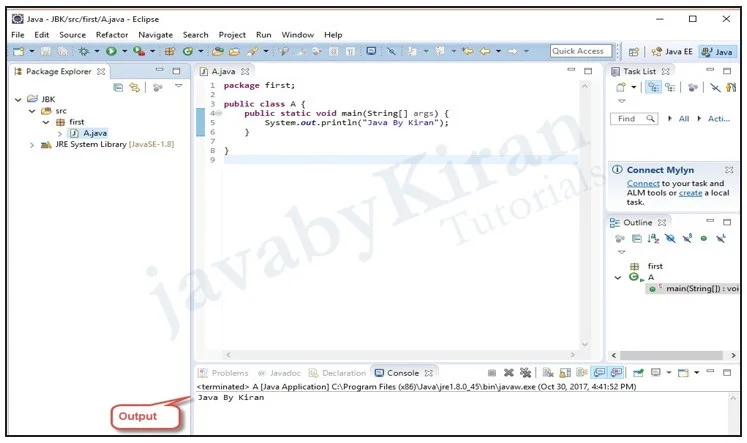
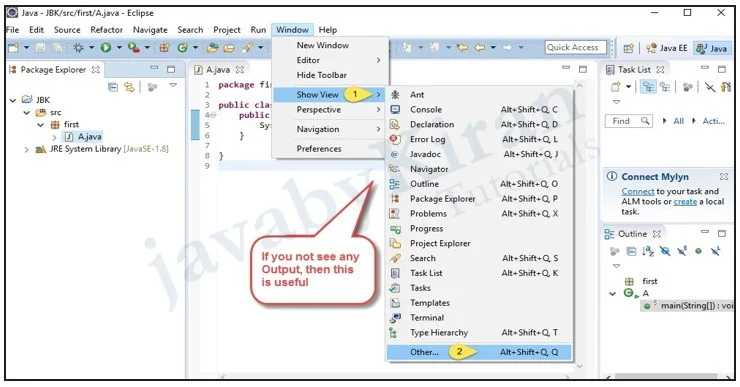
If you are not able to show any one of this basic view you can show it using below process:
In the “Menu Bar” go to Window > Show View > Other
There are various “ show view” options and you can further navigate to see more “show view” options by selecting the last option “Other” as shown in the above figure.
Select Console and you will see Output.
Various Shortcut Keys In Eclipse
| 1 | Any type of relevant suggestion | Ctrl + Space |
| 2 | Main Method | Type “Main” and Ctrl + Space select main from suggestion |
| 3 | Printing Statement | Type “syso” and Ctrl + Space select sysout from suggestion |
| 4 | Delete Line | Ctrl + D |
| 5 | Duplicate Line | Ctrl + Alt + Down Aero |
| 6 | Comment | Ctrl + Shift + Forward Slash (/) |
| 7 | Save All File | Ctrl + Shift + S |
| 8 | Close File | Ctrl + W |
Steps to add extra plugins in eclipse
Note : Internet availability is a must.
In the “Menu Bar” go to Help > Eclipse Marketplace as shown in the below diagram:
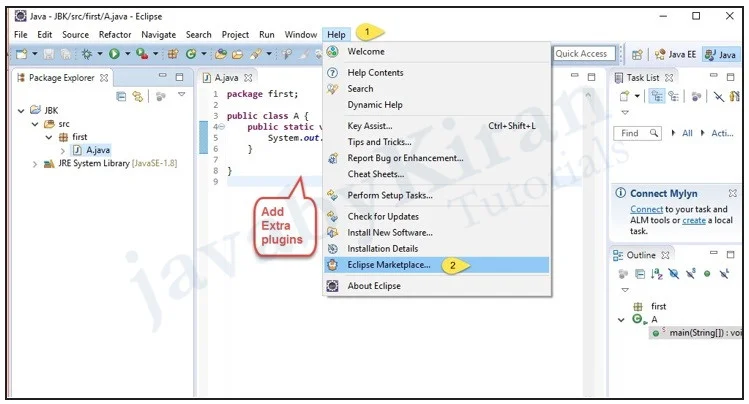
Below shown “Dialog box” will be displayed:
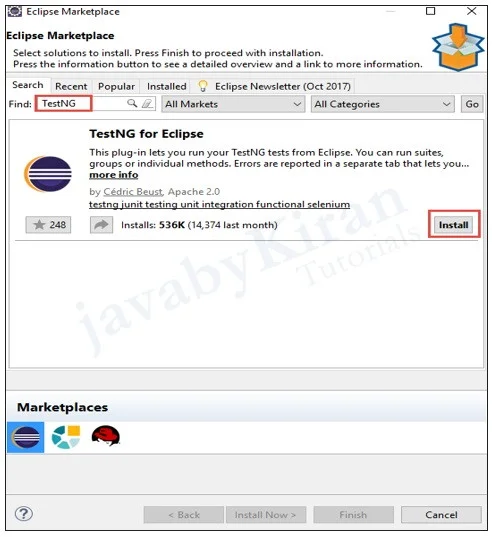
Type the name of plugin in the “Find” field you want to install and then press “install”.
If you have already installed that plugin then the button will be disabled and and it will show you “Installed” on that button.
After that, the below shown image will appear.
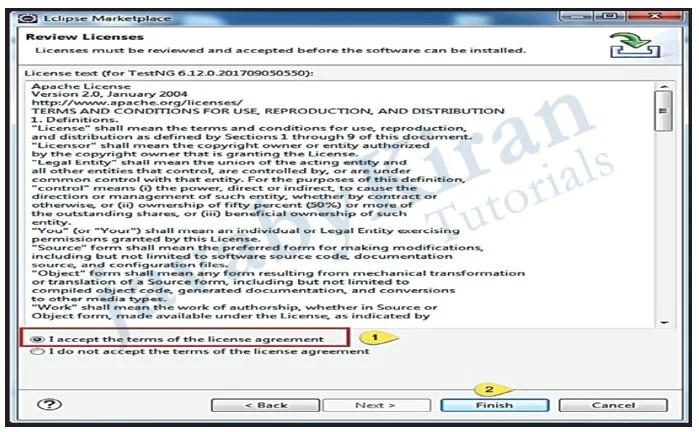

Click on “I accept the terms of the license agreement” and press on “Finish”. It will take sometime and after that an alert of “installation software update’ pops up which will ask to restart.
So now press on “Restart Now” for use.
If we are going to use something else other than java and j2ee class, then we need to add external libraries (.jar) in our project like Selenium or TestNG.
For java and j2ee we do not need to add jars because when we install JDK(Java Development Kit) or JRE(java runtime environment) it will automatically get installed by default and linked to eclipse.
For eg. If you want to use “selenium web driver” functionality then you need to add selenium jar file externally.
After that right click on Project > Build Path > Configure Build Path
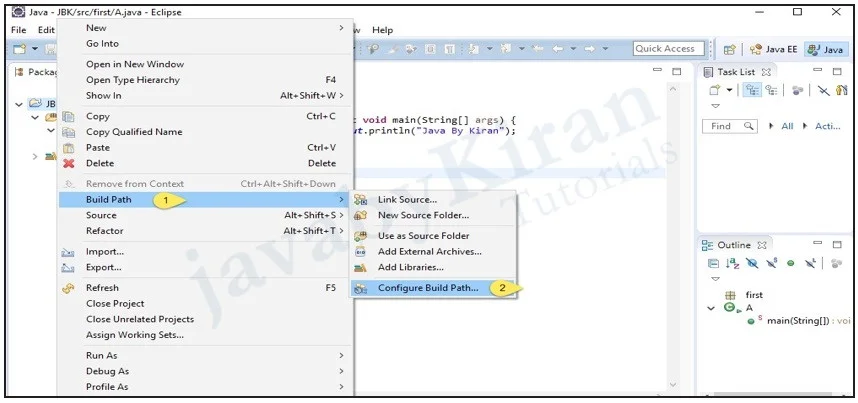
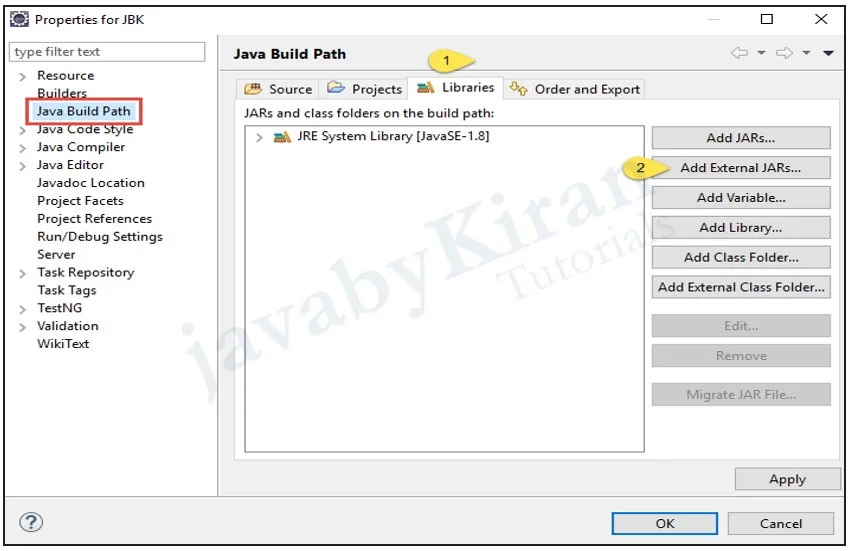
After this click on “Add external JARs” as shown in the above figure.
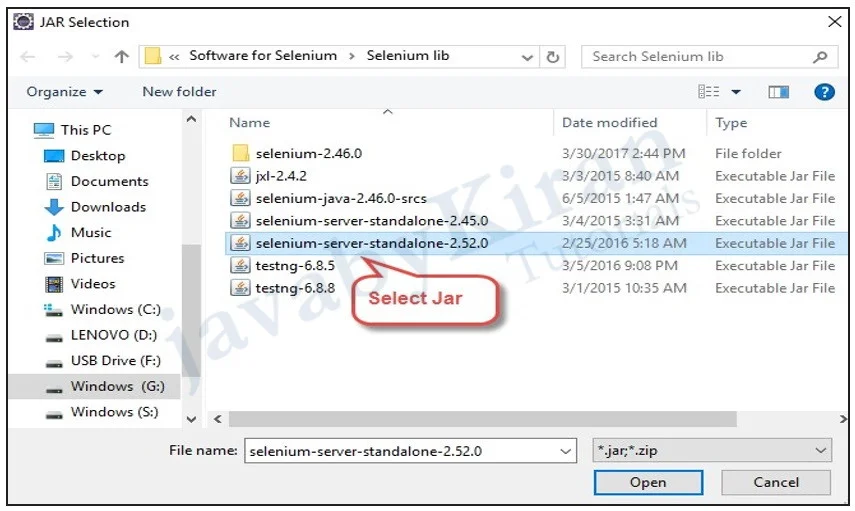
Select appropriate/required jars.
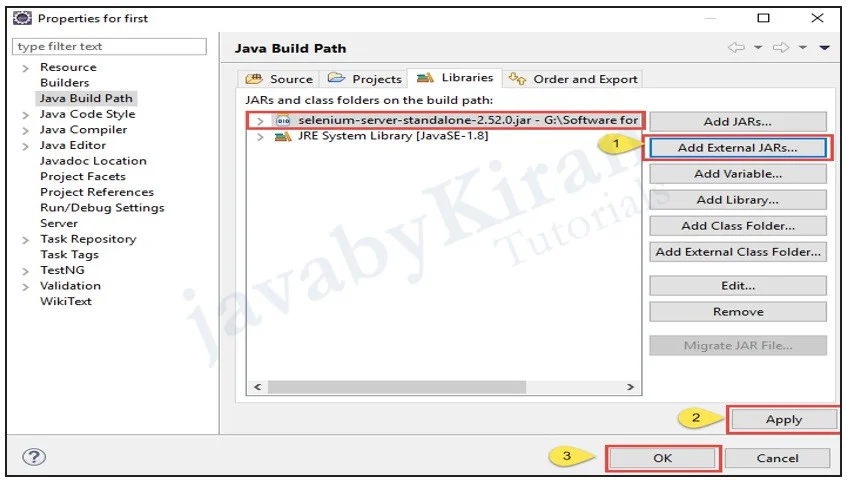
After selecting the JARs click on “Apply and Close” button.
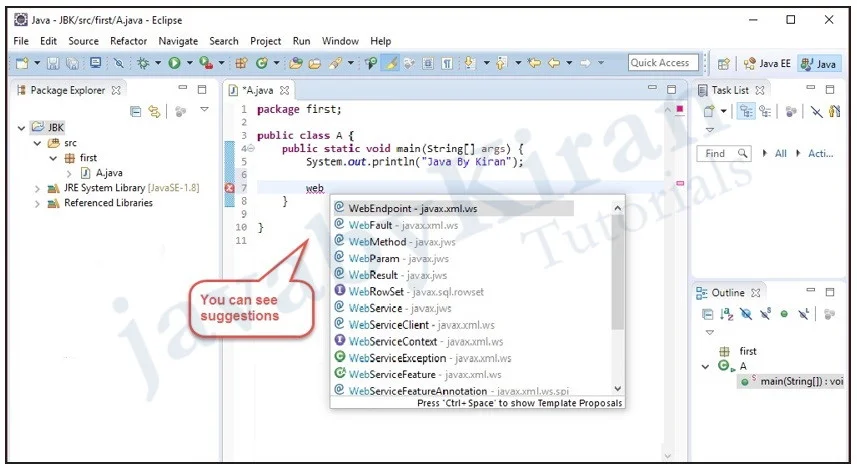
You can see suggestions after you have added the JARs as shown below:
