Spring Boot Project with Spring Initializr
Create Spring Boot Project with help of spring initializr
Step 1:- Go to URL -> https://start.spring.io/
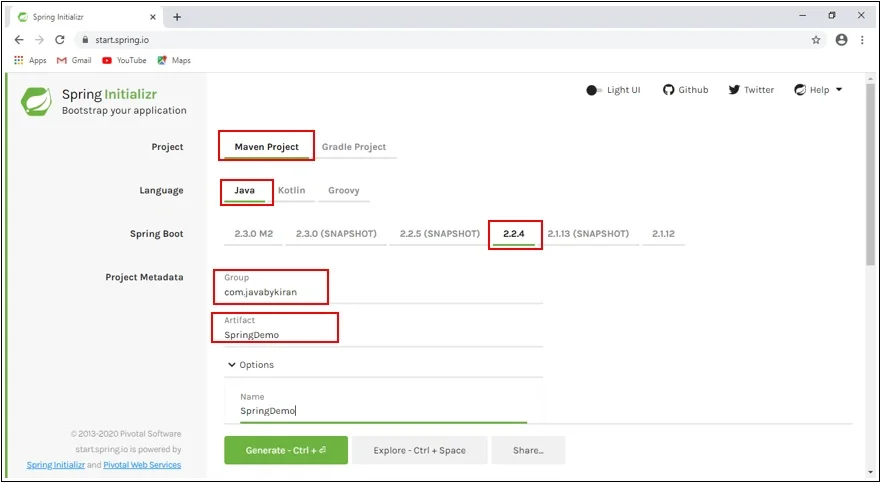
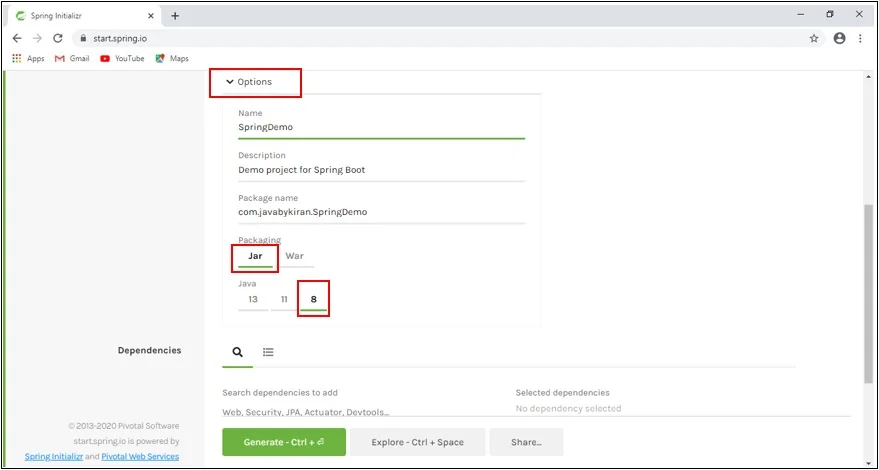
Step 2:- Fill the details on Spring Initializer page as below.
Project – Maven Project
Language – Java
Spring Boot 2.2.4
Project Metadata:-
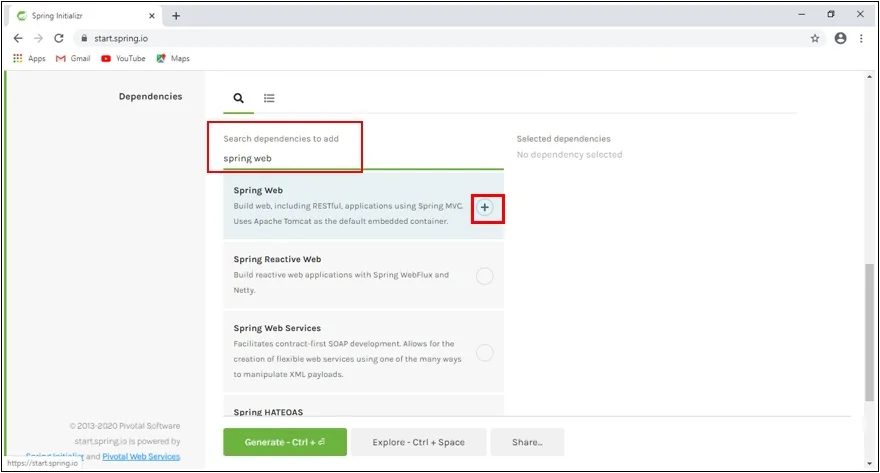
Dependencies (eg. Spring Web, Spring Boot Devtools)
To add dependency – Search the dependencies to add -> Click on Plus side (Dependency will get added).
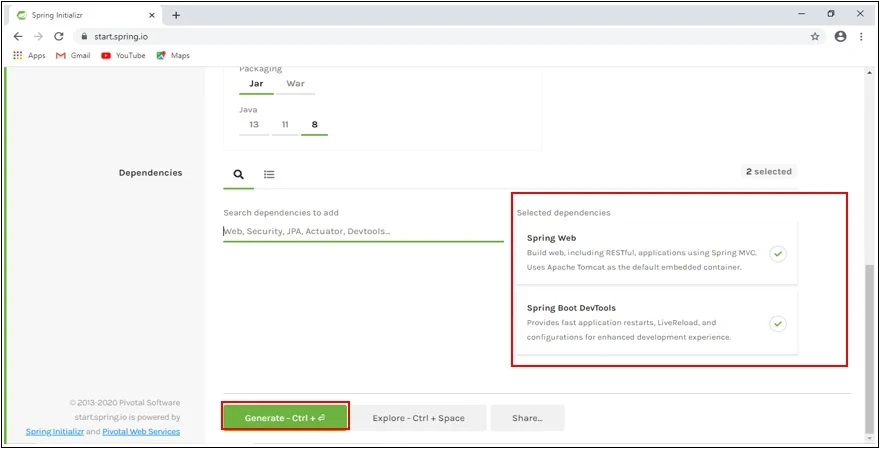
All the added dependencies will be get shown on right side as below.
After adding all dependencies click on Generate (This will download your project).
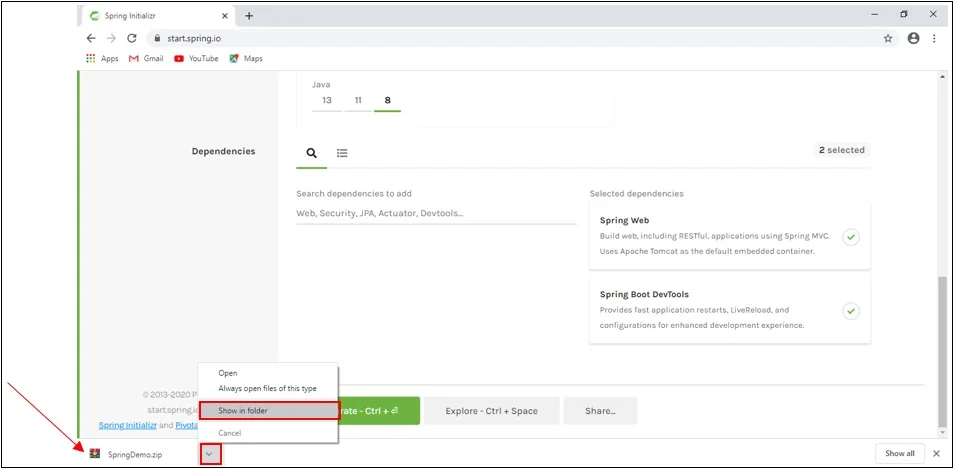
Open the folder in which project is get downloaded with the help of option show in folder.
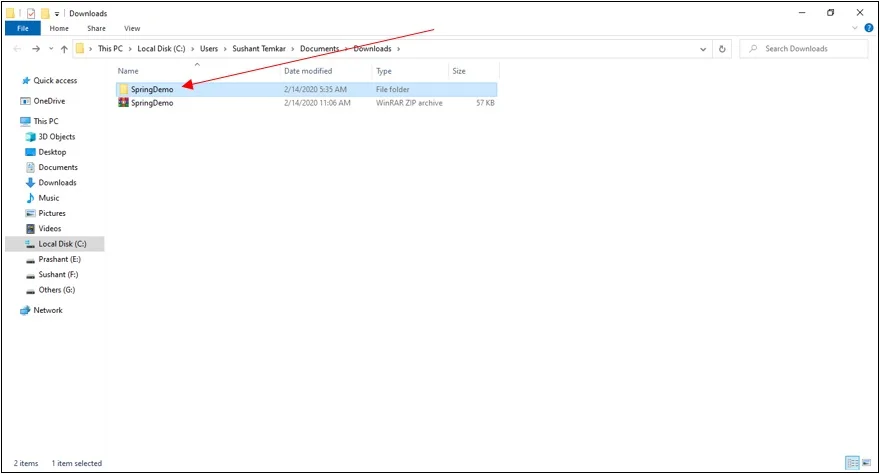
Right-click on project and click on Extract Here.
Open the Eclipse IDE
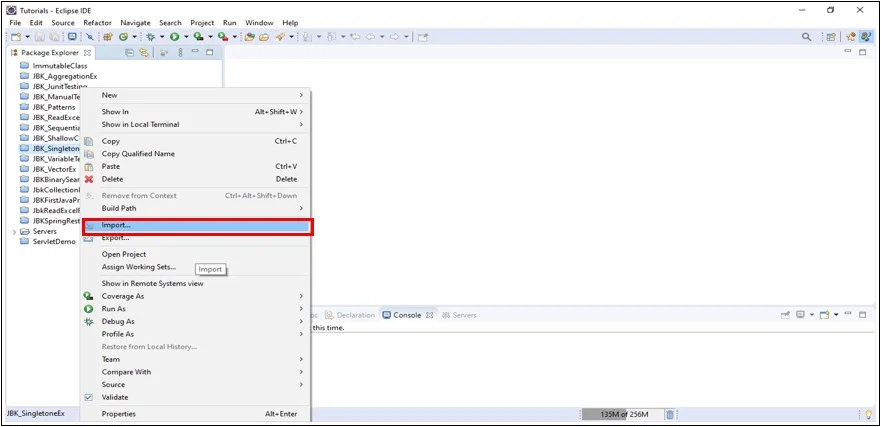
Import the extracted project folder in eclipse with the help of Import option.
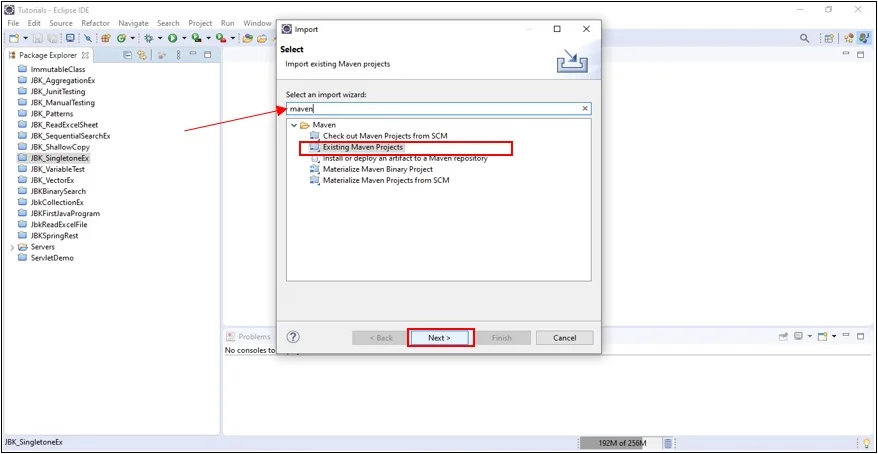
In the search box type Maven and choose Existing Maven Projects.
Click on Next.
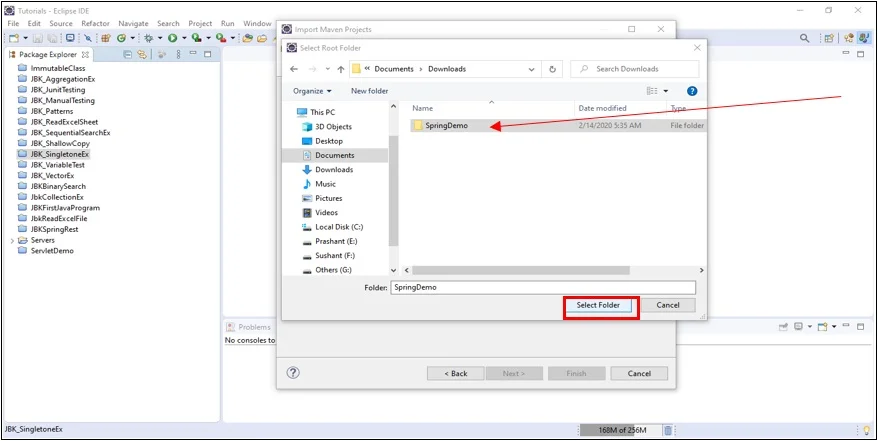
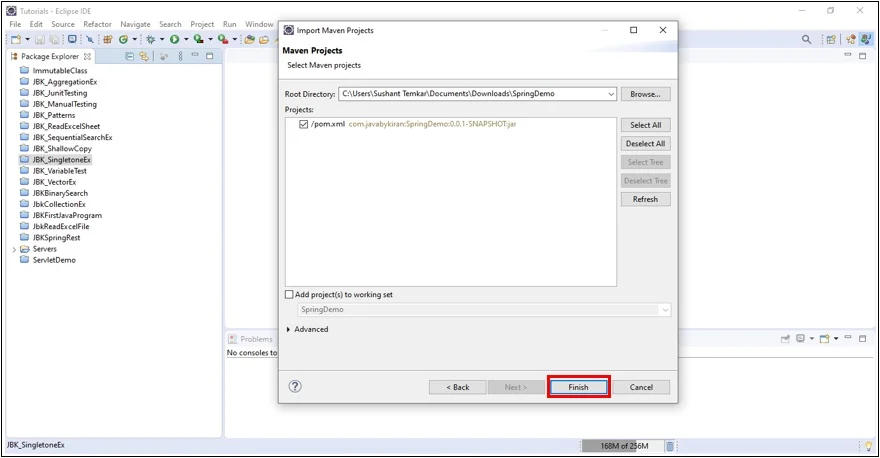
Browse the Project and select the project folder.
Click on Finish.
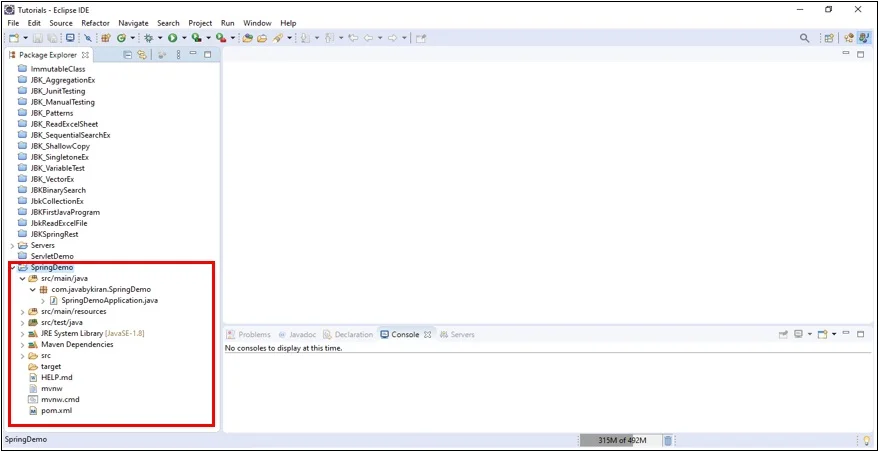
Now we can see that our project is imported as shown is below image.
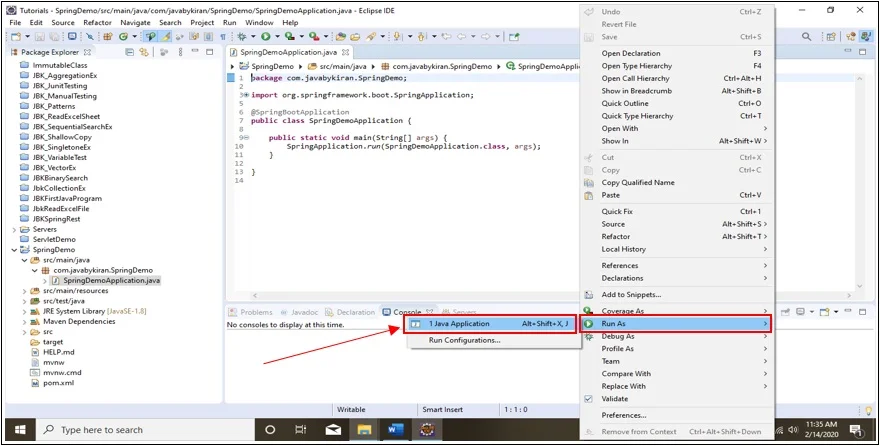
Open the SpringDemoApplication.java file
Run SpringDemoApplication.java as java Application
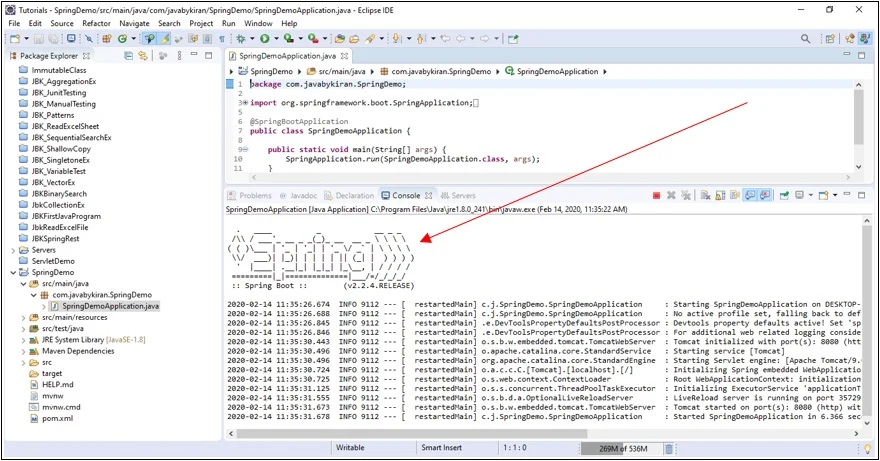
On Console you can see image of the Spring which means that your spring boot project is successfully imported and running.
Step 3:-
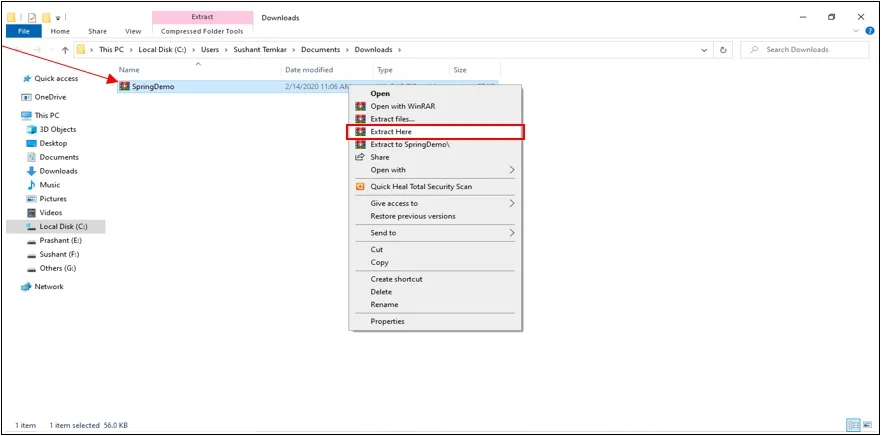
You can see extracted file as shown below.
Step 4:-
Step 5:-
